The Pin You Use to Make Things Be Able to Spin in Art Class
Today I'm going to prove you how to make pinwheels – they are and so pretty and they really spin! These are a elementary, summer arts and crafts projection you can make with household materials.
Since I wanted to make these for my kids, I really needed to find a way to make sure the pinwheel wouldn't interruption apart and send pieces flying everywhere! This method works beautifully!


I had posted another pinwheel project before, but I only wasn't happy with the results. You tin cheque out my other paper pinwheels tutorial hither, simply go on in heed that I much prefer this new method (below) of securely attaching the pinwheel to the wood skewer.

Paper Pinwheels Supplies:
Hither'southward what you'll need:
- paper cutting into 6″ x 6″ squares
- woods skewers
- a gum gun
- small chaplet
- sewing pins
- a thumb tack
- needle nose pliers
- scissors
I used thick paper with a texture on i side, but you can use any type of newspaper y'all want. Plainly, patterned, thick, or sparse – The thinner the paper, the faster your pinwheel will spin!
Any small-scale beads will work – as long every bit they are round and smooth. The bead is what will push the paper abroad from the wood skewer and assist brand the pinwheel spin.

How to Make Pinwheels:
Pace i: Cut your newspaper
Cut your newspaper to six″ x 6″ squares. Use a pencil to lightly mark an "X" from corner to corner on the paper.
Poke the holes and cut co-ordinate to the template below. The dots are where you need to poke the holes, and the "cut hither" lines are where you'll demand to cutting.

I used a thumbtack to poke the holes. The sewing pin would probably work too, just I found information technology easier to press downwards with the finish of the tack. Just make sure you have a stack of papers or a magazine under it.

You lot can approximate the distance you cut towards the center equally you go. Yous actually don't need to be exact as long as each of the cuts is close to the same length as all the others.

Footstep 2: Brand the pinwheel shape
Use needle nose pliers to bend the sewing pin (it bends really easily). I bent mine so there was nigh ane/2″ from the ball to the bend.
Y'all need to exist able to fit the newspaper, the dewdrop and the skewer in this space, so it volition depend on the thickness of all the supplies yous're using.

Poke the pivot through a hole in i of the corners. And then poke it through the second, third and fourth corners.

Finally, poke the pin through the hole in the middle of the paper. Maneuver the papers around the bend in the pin so the entire pin is poking out the back:

Step 3: Make the part that permit's it spin
Slide the bead onto the pivot:

Use the thumbtack to poke a pigsty through the skewer about 1/four″ from the cease.
You are probable going to split the wood of skewer, merely that's okay, as long as y'all make an opening for the pin to go through.

Poke the pin through the hole in the skewer:

Rotate the pivot so that it is lying apartment against the skewer:

Step 4: Gum information technology all in place
Use your thumb to hold the lesser of the pin apartment confronting the skewer then employ hot glue to cover the top function of the pin.
Fill in the cleft in the skewer where it split. You lot'll have to go along your thumb on the bottom of the pin while the glue dries or it will popular up away from the skewer.

Once the top part of the glue is dry, hot gum the bottom role of the pin, beingness careful to completely embrace the end of the pin (you don't want it poking anyone!).
As long every bit you lot put a generous corporeality of hot glue on, the sharp function of the pin will be completely buried. You want the pin to be completely secure so it won't popular off while people are bravado the pinwheel.

The photo beneath shows the other method I tried, but I just wasn't happy with it. Instead of using a sewing pivot, I just used a thumbtack, but the thumbtack wasn't long enough to securely stay in place. Then inside two or three turns of the pinwheel, everything would popular apart and the thumbtack would go flight – no i wants a thumbtack somewhere lost on the flooring!

Footstep 5: Play with them!
With all the hot glue, these things are REALLY secure. I experience confident that y'all can requite these to your kids to play with. Obviously you'll demand to use your own judgement here, but as long as your kids aren't completely roughshod with them, they should safely stay in one slice.

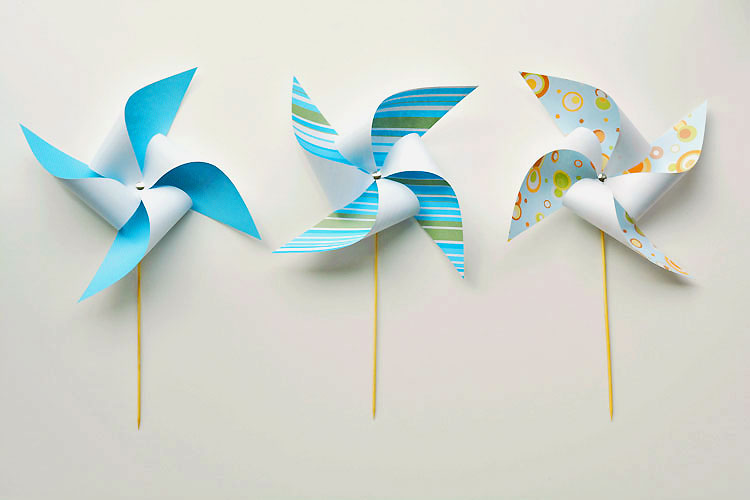
And this is what they expect from the front. Aren't they pretty?!

I used thick paper, and then we had to blow a piddling harder to spin them around, merely they still worked beautifully! My v year old had no trouble getting them to spin effectually!

Aren't they gorgeous? They'd make nifty favours to requite out at a party or charcoal-broil! Make them from your favourite coloured paper, or use patterned newspaper. They turn out perfectly every fourth dimension!

You have no idea how much it pains me in the photograph to a higher place that that dizzy greenish pinwheel is crooked. lol Holding vi pinwheels with one hand is So NOT Piece of cake! (Only another backside the scenes blogger moment for you…) haha

These brand cute party decorations, or fifty-fifty party favours! They are really easy to make and look wonderful when they are finished. Y'all can brand them from whatever colour paper to match your decor. And best of all, they really spin!
This postal service was originally published on July 12, 2015.
Meet the other method for making pinwheels:
Source: https://onelittleproject.com/how-to-make-a-pinwheel/
Post a Comment for "The Pin You Use to Make Things Be Able to Spin in Art Class"